Getting Started
⬇️ Installation
- Download the plugin zip
- Open Blender
- Go to Edit > Preferences in the top menu bar and go to the Addons tab on left.
- Click "Install" button.
- Select the zip you downloaded.
- Blender should confirm it's installed by automatically searching for "MIDI to Keyframes" and showing it checked off.
🎥 Tutorial
Here's a video walkthrough of the plugin and it's major features (up to v0.0.5):
🔰 How to use
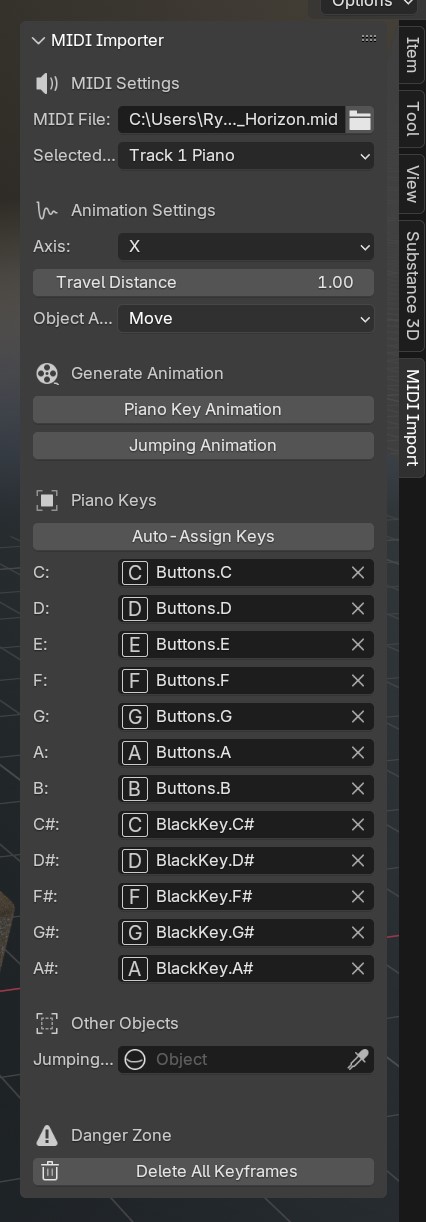
- Open up the side panel labeled "MIDI Importer", it's available in the 3D viewport in the n-panel (the right side panel that's usually collapsed). Click the little arrow on the top right or press
CTRL/CMD + ]to expand the n-panel and find the MIDI Import tab. - Select a MIDI file you'd like to import.
- Assign 3D objects to piano keys.
- Click the button labeled "Generate Keyframes"
Not happy with the animation? You can undo the keyframes (
CTRL/CMD + Z). Can't undo? Try the "Delete All Keyframes" button, it will delete all keyframes on any selected note object.
Once you've finished watching the tutorial check out the tips and tricks next to learn a little more.